Dallas Cowboys Passing Game: The First Ten Weeks
By
Joey Ickes
@JIckesBTB on Nov 20 2013, 9:00a
103
A marathon film session to watch every pass the Cowboys have thrown in 2013? Yes, that happened, and the results are below detailing the Cowboys ups and downs on offense.
So far in the 2013 season, according to
Dallascowboys.com, Tony Romo has completed 239 of 370 pass attempts for 2,681 yards. Along with these 370 attempts, Romo has taken 22 sacks over the course of 10 games, and this weekend, I decided to watch every single one of them, at least twice.
So on Friday evening around 6 o'clock I settled in for the closest I've ever been to a coaches and players marathon film session, after calling it a night at 10 pm, I started up again at 8:45 Saturday morning, and finally finished with the Saints game at around 4:30 pm. So that's essentially 12 hours of film work over two days focusing on every aspect of the Cowboys passing game I could possibly observe, and now it's my goal to share the lessons I learned, first to describe the current state of the Cowboys passing game, and secondly (later this week) to prescribe my theorized cures for what ails the once explosive Dallas offense.
Major Points:
Play Calling:
Overall I was pleasantly surprised with the nuance involved in the design of the plays the Cowboys put on the field over the first 10 weeks. There is a lot of criticism thrown around by fans and writers alike (myself included) that this offense doesn't have any bread and butter plays that they can depend on when they need a conversion, and that the coaching staff doesn't do enough creatively to get their players in favorable situations, and doesn't use guys like James Hanna and Lance Dunbar properly or frequently enough.
However, when I was able to watch this offense, and take in the games as a big picture, and see the trends from game to game as well as series to series, I was able to uncover several "go-to" plays that this team turns to multiple times a game when they need conversions.
Let's go to the chalkboard to look over a few of those schemes:
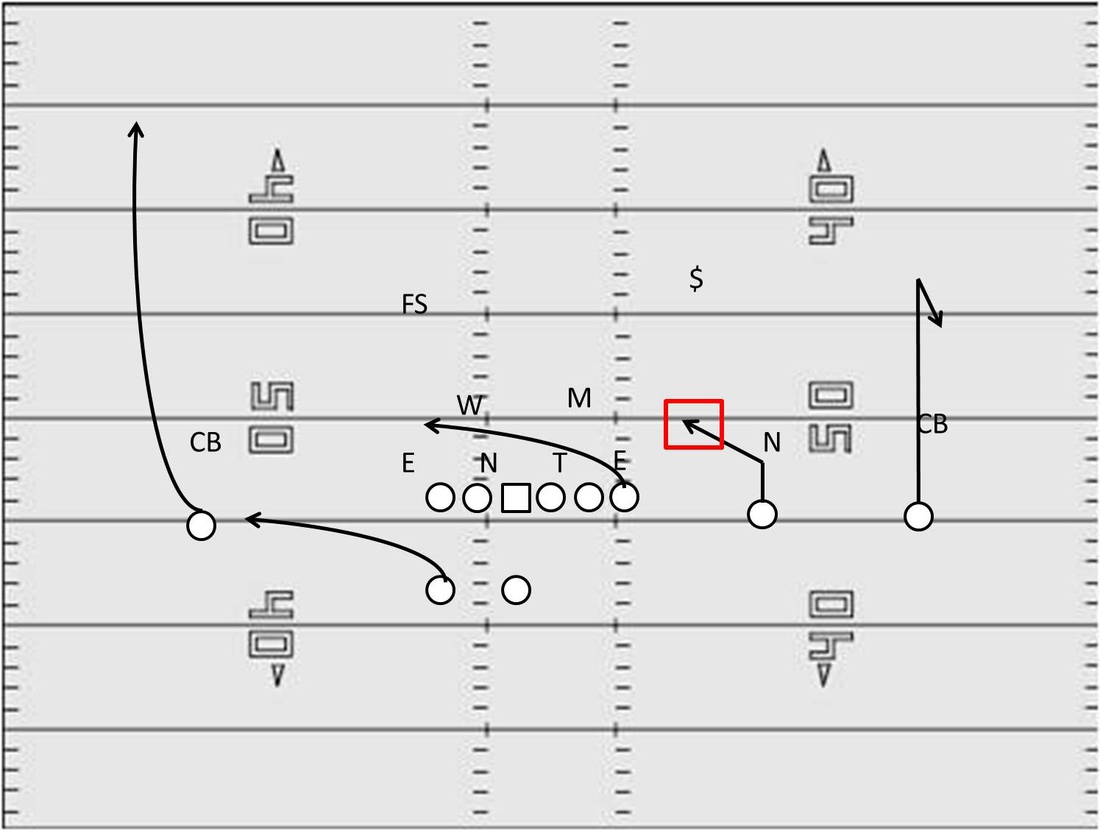
The key piece of this combination is the drag route by the TE and the slant route by the slot player. The drag route from the inside pulls the LBs to their right, leaving the perfect open space to throw the slant route behind it. Pulling the LBs out of the play gives the slot player leverage on the nickel corner and gives a very solid window. The Cowboys have used this play to get open looks for guys like Jason Witten, Cole Beasley, and Miles Austin through the course of the season, and it has been a productive play for them in varying down and distance and field position situations.

This play is one of the most basic and common plays in all of football. This "All Curls" look features short 5-yard hitch options from the 2 inside receivers (or TE) and normal depth (12-15 yd) curls from the outside guys. Jason Witten catches a ton of balls in this look, which creates a horizontal stretch on a zone defense, and gives Romo relatively easy reads.
This combination, driven by the two crossing routes over the middle, is called the "Mesh" concept. Most times the TE is taught to set his depth at about 6 yards as he crosses the field, and the opposite WR crosses underneath him, both receivers run their crossing routes with Run vs Man, Sit vs Zone rules. This play creates a rub to help either player get open against man coverage as they cross paths. The throw is designed to be made to either crosser in their first window after the mesh point. So if it's a zone coverage, they execute the mesh and sit in the first open area they find. Many teams will teach a corner or out route by the #1 WR on the strong side, and teach the progression as Corner-Flat-Frontside Mesh-Backside Mesh, but I've seen the Cowboys use comebacks with this combination.

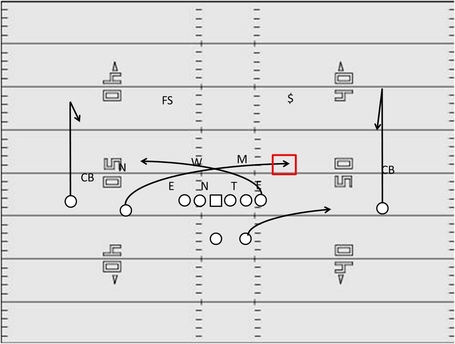
This is a play that when you see the Cowboys run it, you really feel like they can get this anytime they want it. When they fake the run and run a dig behind it on the front side, it seems like it's open every time. Of course Dez Bryant is the most dangerous target on this play, as the dig is probably his best route, however, Terrance Williams has been open for chunks on this play multiple times this year as well.
Now that we've looked at a few of the Cowboys "Bread and Butter" plays, lets look at a couple of examples of some pretty creative things they are doing packaging multiple plays together on one snap.
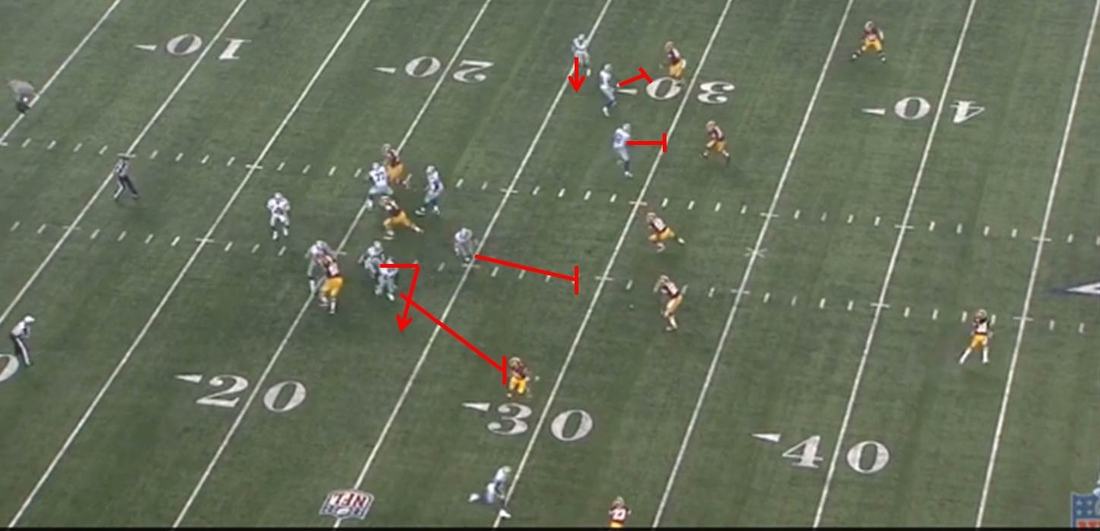
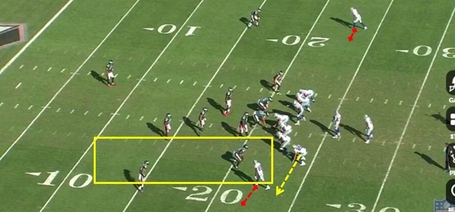
First off, let's look at a play where the Cowboys set up a WR screen and RB screen on the same play, starting presnap.


Shortly following the snap we can see the two inside receivers to the topside setting up a variation of a tunnel screen for the #1 receiver to that side. Simultaneously Travis Frederick and Brian Waters have released out in front of RB Joseph Randle setting up the slow RB screen. This gives Romo the option to choose where the ball should go to give a player an opportunity.
At this point the ball is out and on its way to Randle in space with blockers in front of him. Very good design on the play, and a good decision by Romo, resulting in a positive play against a team that brought tons of pressure against the pass.
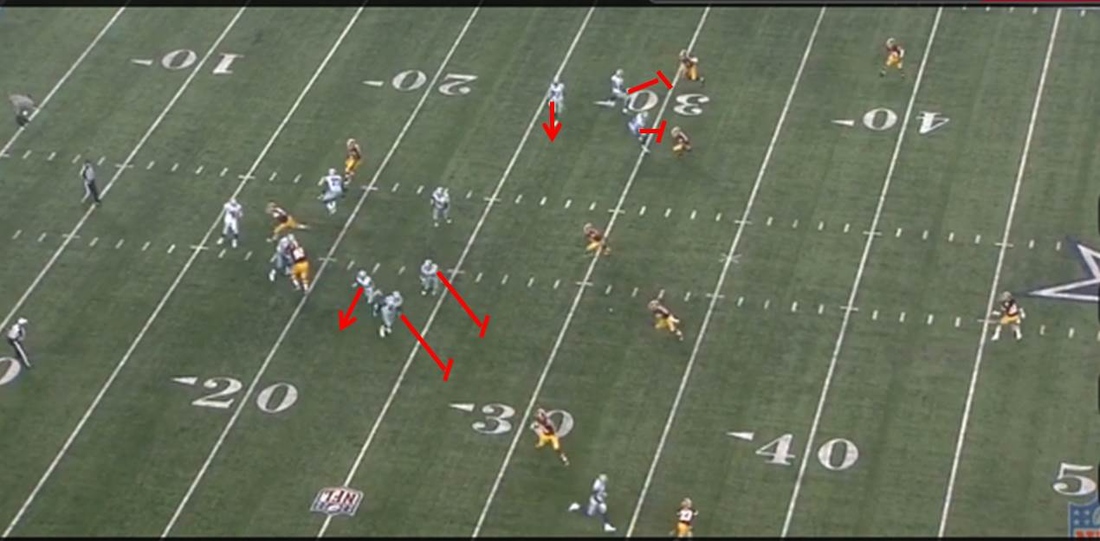
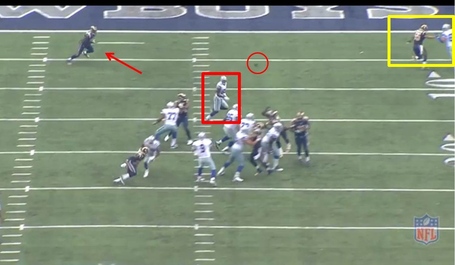
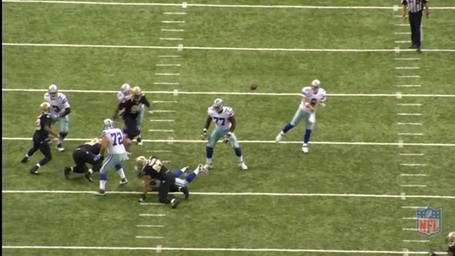
Next we'll look at a play run vs the Saints that packages a run and a pass in the same play.
This is the play that resulted in DeMarco Murray's TD run against New Orleans. On this play you see the offensive line setting up an Outside Zone run to the left, while Terrance Williams and Dez Bryant are setting up a bubble screen to Cole Beasley. Again, Romo has the option to give to Murray or pull and throw to Beasley, and in this case with 4 defenders to the wide side, the ball goes to Murray.
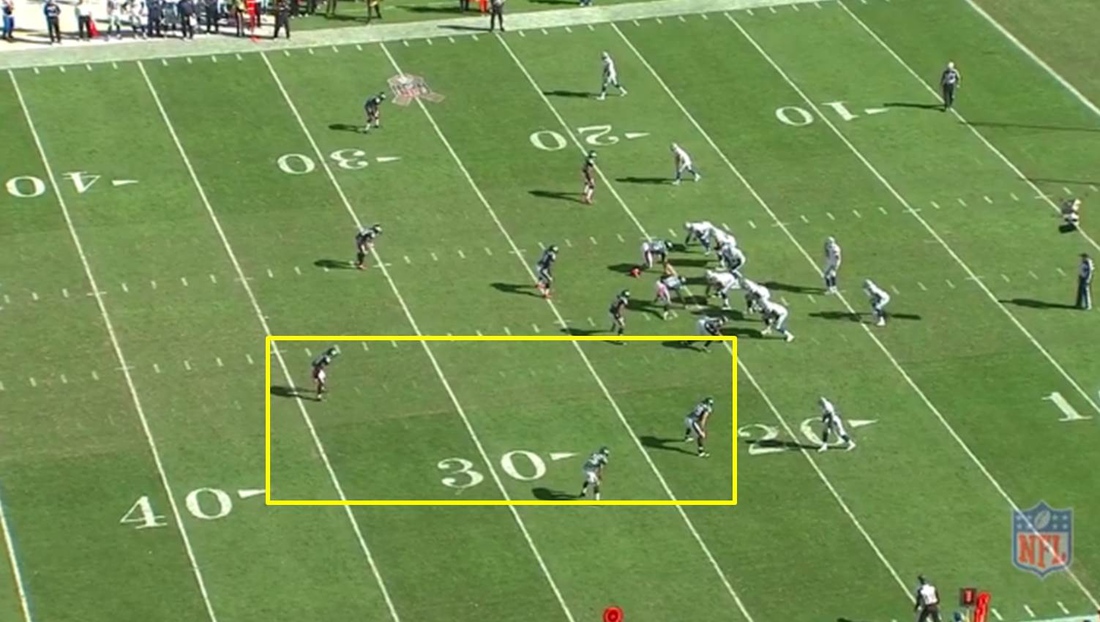
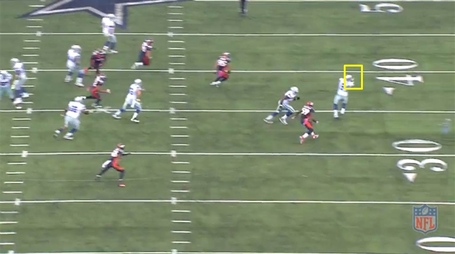
From a formation perspective, the Cowboys started off the year in the first game with the Giants running a very multiple formation offense, they were in the pistol, the shotgun, under center, and many times had 2 and 3 tight ends on the field lining up in multiple positions. However, as the season has worn on, the formations have become more and more simplified.
Dez Bryant & Jason Witten
It is clear, whether looking at statistics or watching the film, that Dez Bryant and Jason Witten are the focal points of the Cowboys passing offense. Because of this, teams do lots of things to try to take those guys away as options for Romo. Let's look at a few examples of how defensive coordinators set their attention on the Cowboys best weapons.

Here you can clearly see the 2 defenders within 8 yards of #88, as well as the safety with his hips and eyes turned outside.

Here you have the safety to Dez's side (near side) lined up well outside of his normal pre-snap alignment. In fact he is just a couple of yards away from a safeties land mark his zone drop in Cover 2.

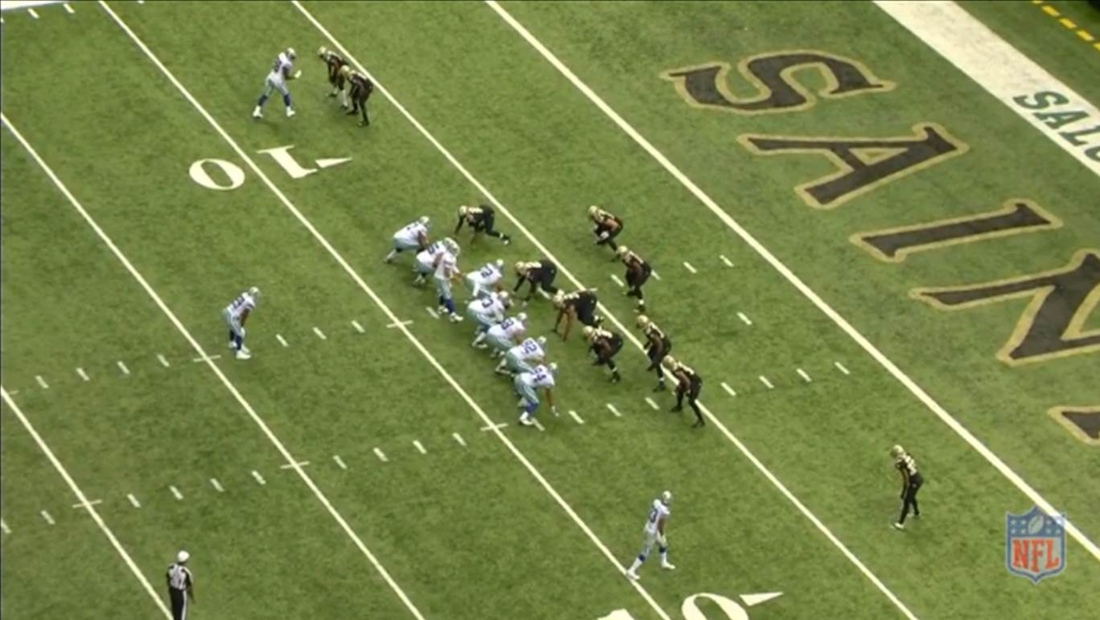
Now to the top side, we have Bryant on the backside of a trips set, still with a press CB and a safety rolled up to less than 5 yards from the LOS. You can also see Witten and Harris stacked to the frontside, which draws additional attention from the Saints' D.
This one pretty much speaks for itself.

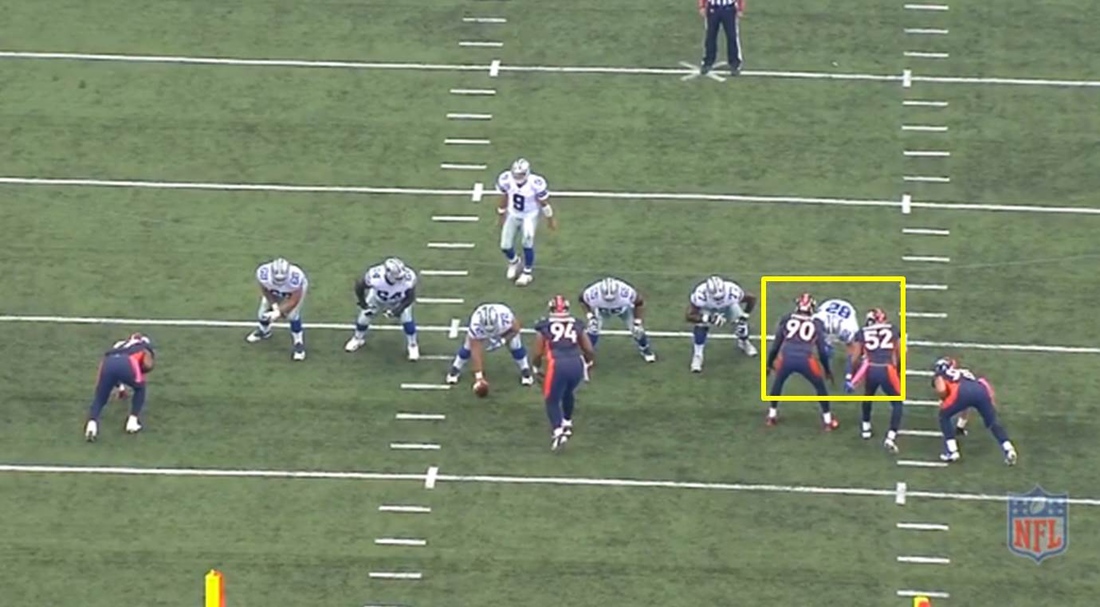
You think the Broncos were dead set on preventing Witten from getting a clean release into his route?
We all knew that those guys got lots of attention from defenses, it has been the topic of conversation for weeks. But what do the Cowboys do to get these guys some freedom from these situations, this is an area that I definitely think can and should be improved upon, however, things like the stack set shown in the first example from the Saints game above, as well as putting Dez in the slot, or in the middle of a trips group have been used. Before we look at another way Callahan has schemed Bryant a mismatch, let's look at a quick shot from the Eagles game, on Dez running one of the crossers on the mesh play, and see why that play can be effective.
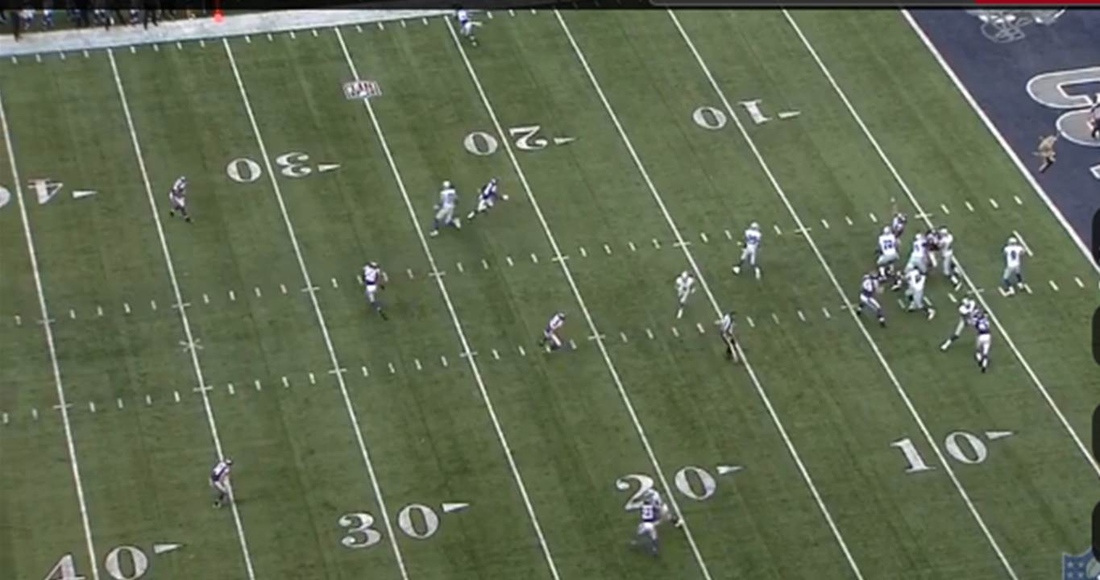
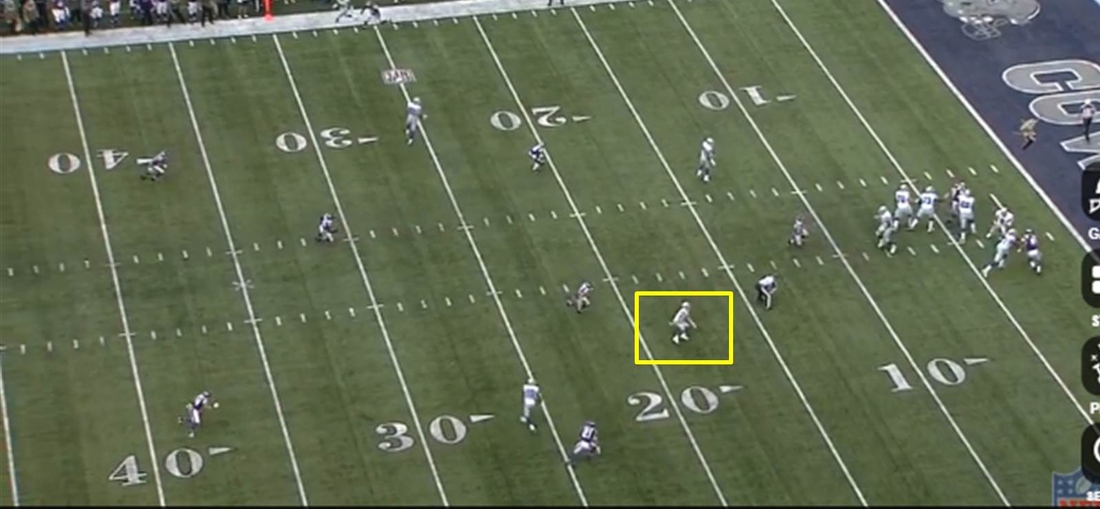
Here we see the mesh taking place down field, with solid protection against 5 man pressure, You see 2 guys chasing Dez, however, as the rub takes place, you can see one of those players pointing to the LB on the opposite side that he needs to peel off of Witten to cover Dez, however, he's got no chance with Dez at full speed, and the result here is an easy throw and catch for an explosive Cowboys play.
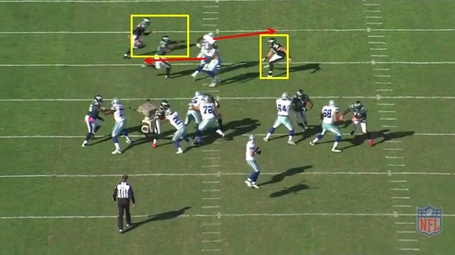
Here we see Dallas in the pistol set, with a TE (Escobar) offset as an H-Back to Romo's left. The dotted red lines near each WR represent the distance of their front foot from the bottom of the numbers which is a typical landmark for WR alignment. Notice that Dez is aligned with a reduced, or "Nasty" split to the short side of the field, with a CB in off man position, and an OLB splitting Dez and Escobar. However, the Cowboys motion Escobar outside of Dez, forcing the CB on Dez to widen out to Escobar, leaving the OLB essentially 1 on 1 with #88, advantage Dallas there.
Tony Romo
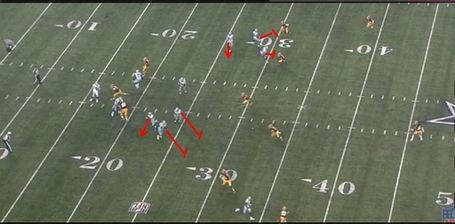
There has been a lot of national talk this year, at least up until the Sunday night prime time debacle of a performance against New Orleans, that Tony Romo has been in the midst of his best season as a pro. When I watched each and every play, there is no way you can say this is true. Let's take a look at a few of many examples of Romo failing to either make the proper read, or proper throw, whether from bad mechanics or just poor location. First off, an example of a bad decision.
Here we see Romo forcing a throw up the seam to a tightly covered Witten, with Dez Bryant running WIDE open on a drag route. With the way Dez runs after the catch, there's a high probability he might score on a catch and run, however he never got the opportunity because of Romo throwing to a well-covered player. This is similar to what we
saw against the Chargers as well.
Next we'll see another misread by #9.

Here I want to focus on Cole Beasley, who is running across the field, at the left hash at about the 17 yard line. Now if we look at the way the Vikings are playing, it is clear as day, we see 2 deep safeties, as well as the Mike LB running the inside vertical seam as Witten presses that area before breaking out at the 25, the Vikings are in
Cover 2.
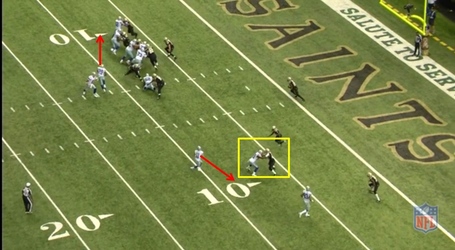
Now we see Beasley sitting down in the hole in the zone at the 19 yard line, and Romo throwing the ball in his direction, should be an easy throw and catch right?

From this angle we can see the clear window Romo had to throw the ball into. However based on the ball placement, one of tw things happened, either Romo made an incredibly inaccurate throw through that window, or what I believe happened, he misread the coverage. He must have read man coverage, and thus led Beasley towards the numbers away from his "man" even as he was properly settling down in the space of the zone.
Now that we've seen Romo make some mental errors, let's look at the physical side of his play as well.

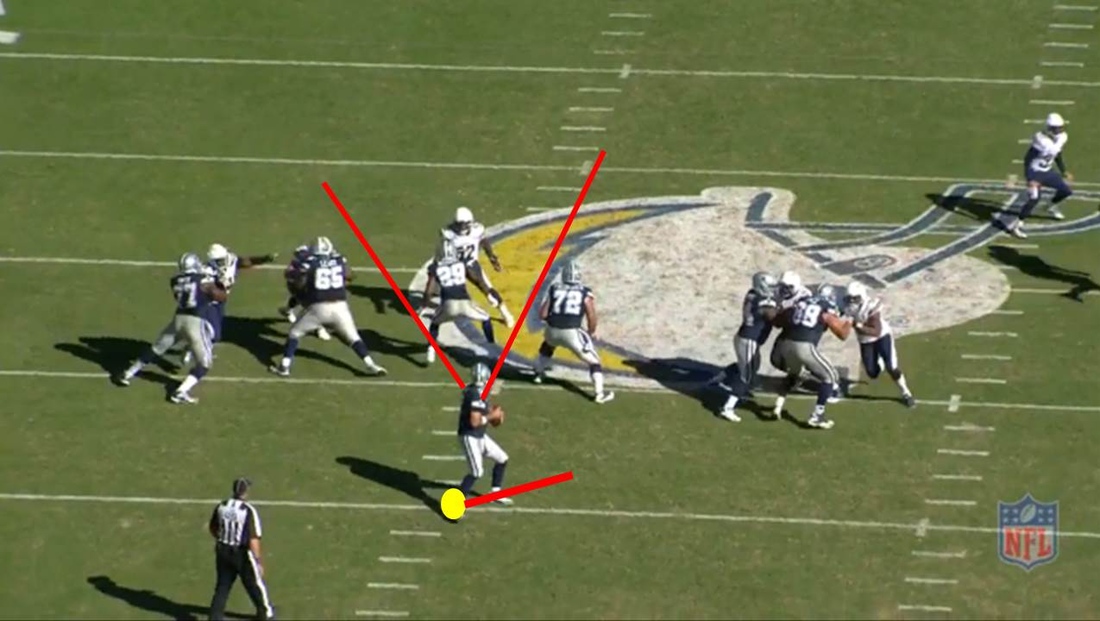
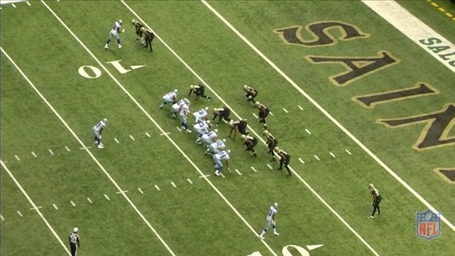
Here we see Romo setting in the pocket at the top of his drop against San Diego. His protection is solid and the pocket is clean. Looking at Romo's stance, we see that the yellow dot represents the plant point of his back foot. At this point in his drop Romo's feet and shoulders should either be square to the LOS or square to his target if he's located one. However, Romo's feet are clearly closed, turning his lower body to his right, while he opens his shoulders to get his eyes around to read his progression.

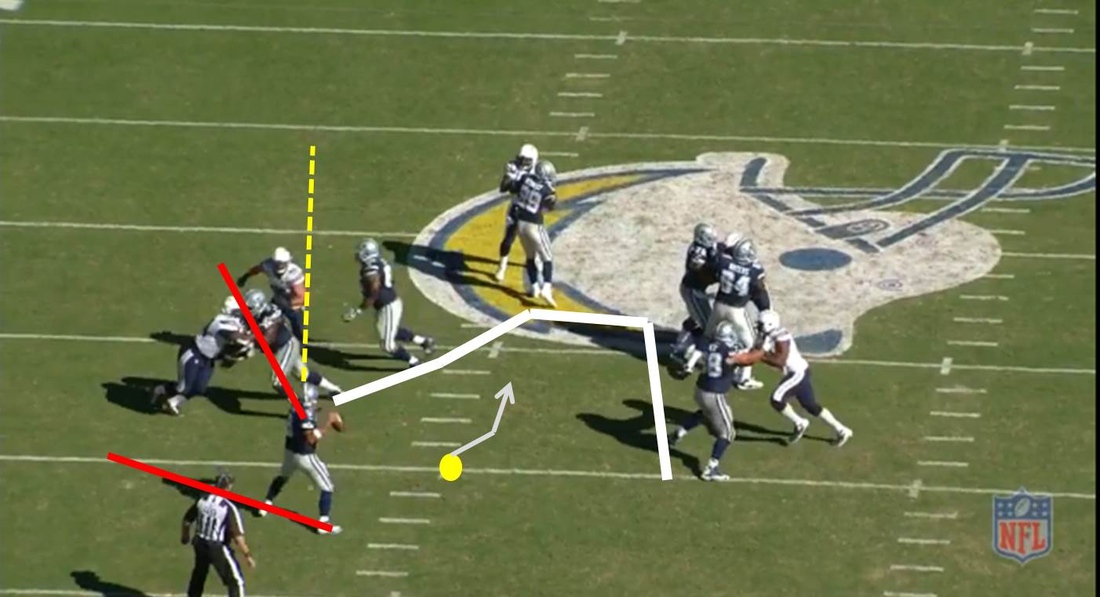
Here we have just a matter of a second or two after the previous shot. The yellow dot still represents the location of his back foot as he reached the top of his initial drop. While the pocket is clearly deep, with a solid front set by his OLine. However, instead of climbing the pocket, and sliding up-field into the protected area (path represented by the white arrow), Romo has drifted a full 3 yards back and to his left. Not only has he drifted into a worse position to read a defense from, he is preparing to throw from horrible body position.
His feet are now wide open, pulling his shoulders open as well, while his head lags behind a little further. At this point in his throwing motion, these three body parts should be pretty close to in sync and pointed to his target. However, in this case, he is all over the place.
This play illustrates Romo's tendency to get lazy feet in his drops at times. It gets especially bad when he is in the shotgun for multiple snaps in a row. A lot of times it looks like he almost expects the play to break down, so he doesn't worry about keeping his feet and his eyes synced up the way QB's are taught. He can get away with this occasionally, specifically if the play does indeed break down and he's able to reset his footwork after escaping the pressure. However, when that doesn't happen, the results suffer.
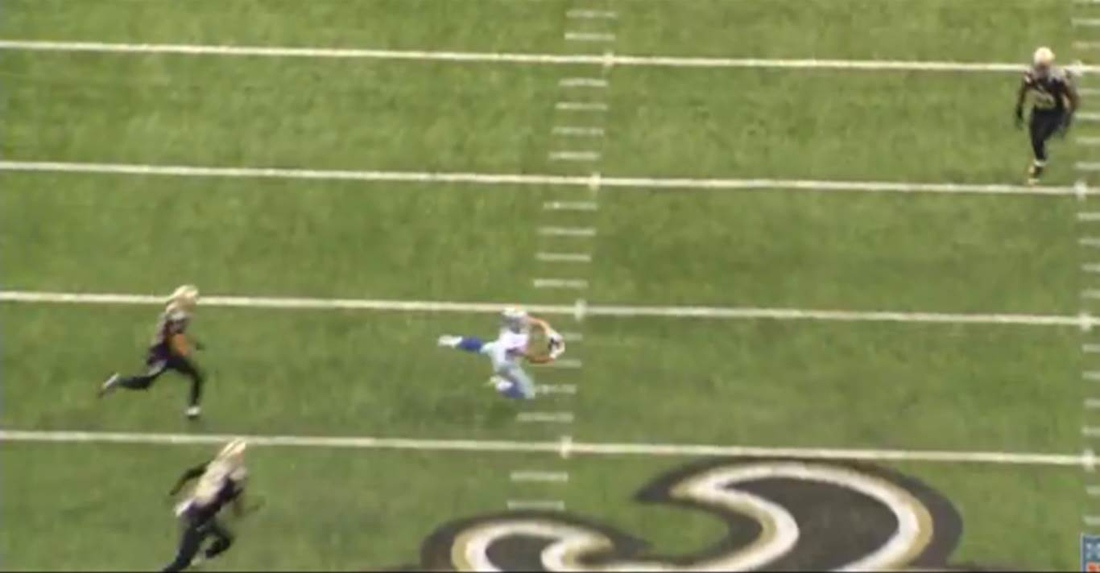
Here we see an example of Romo, having escaped initial pressure, making a throw outside of the pocket. However, notice how off-balance he is. For a QB to maintain consistent accuracy, you have to be balanced, the entire throwing motion rotates around an axis that should theoretically run directly through the top of your head and down your spine.

Now we see Cole Beasley, at the catch point on the same play, having to dive to catch a low pass that led him too far inside. If Romo had been able to square up to the throw, and drill Beasley on the 2nd number 1 on his jersey, you've got a chance for a catch and run for a bigger play. However, the Cowboys left yardage on the field in this example because of poor mechanics at the QB position, resulting in a missed opportunity.
This shot illustrates a bit of nuance in ball placement. This is a TE screen to James Hanna (which I'll never understand), but it looks like they've actually got it set up well. Tyron Smith is out ready to block the Denver LB, to spring Hanna for a decent gain to the inside, however, the ball is placed to his outside shoulder. Receivers are taught that if they are facing back to the QB, they should turn and run in which ever direction the throw hits them. This ball is to Hanna's outside shoulder, leading him to turn to his right and eliminating virtually any possibility for a solid gain on the play. Just another example of the Cowboys leaving yards on the field, not because of design but by execution, specifically execution by the quarterback.
Conclusion:
Although ~2,800 words, 20 screenshots and 4 chalkboard drawings should be enough to convey thoughts on just about any football related manner, there is really much more that I could get into. However, this gives a pretty good synopsis on three prevailing questions regarding this passing game.
While I do agree with the idea that the coaching staff leaves something to be desired when it comes to the rhythm of an offense, and utilizing player's talents in proper ways, I truly believe that the problem with this offense of late has been an execution problem, whether it's
drops by receivers, or failures at the quarterback position as highlighted above, the players are leaving yards and points on the field each and every week through the air.
If the players can simply start making the plays and take advantage of the opportunities that present themselves each week, this offense can get back on track. However, if the players don't make those plays, it doesn't matter who is calling the plays, or what plays they are calling, or what playbook they're calling them from, the offense will continue to struggle.